
How to control multiple instruments simultaneously
MusiKraken makes it possible to control multiple instruments simultaneously. You can layer the sound of multiple instruments and control the volume or other aspects independently, or you can split chords into separate notes and send each to a different instrument. Or you can use multiple controls and send each output to a different instrument.
Setup
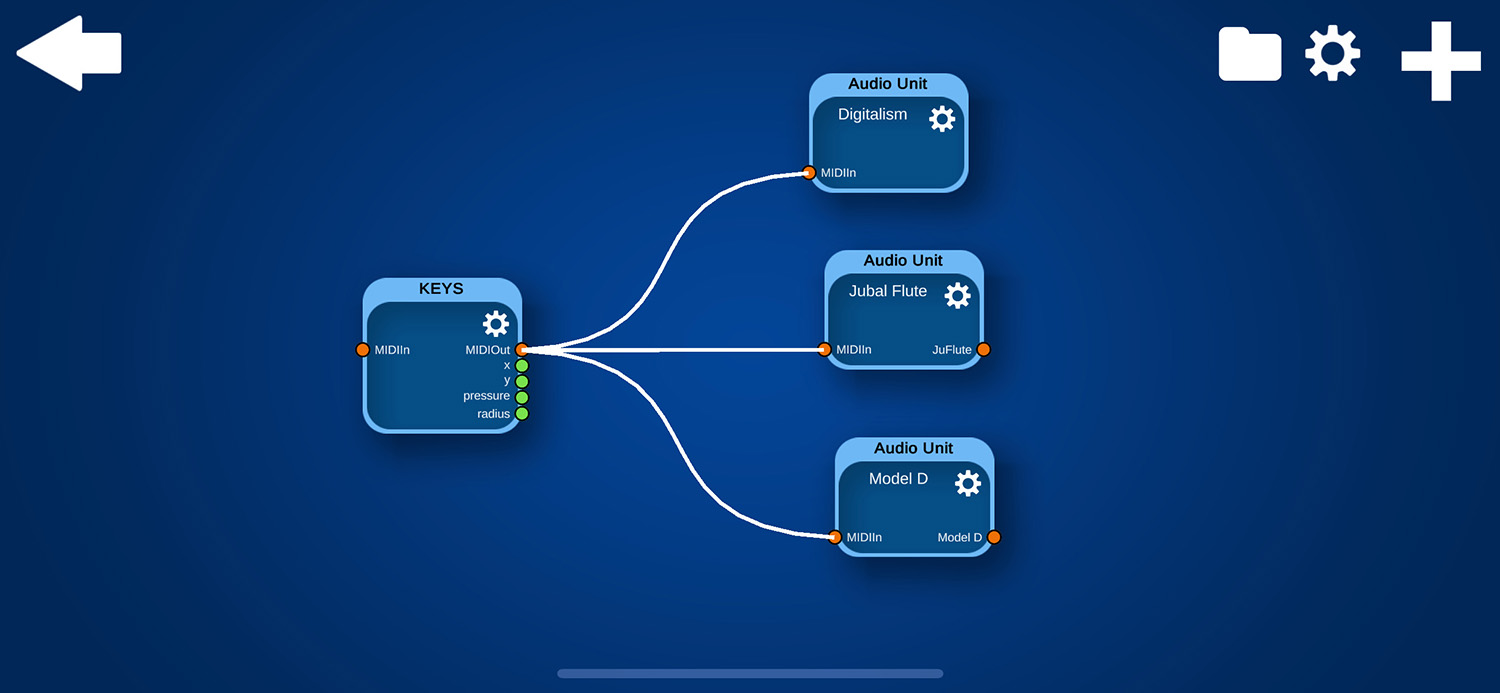
If you want to control multiple AudioUnits, the setup is very easy: Simply create multiple AudioUnit modules and connect to them independently.
The easiest way to control multiple instruments in your DAW on your computer is to restrict each instrument to one MIDI channel. Most DAWs have the possibility to assign a MIDI channel to a track.
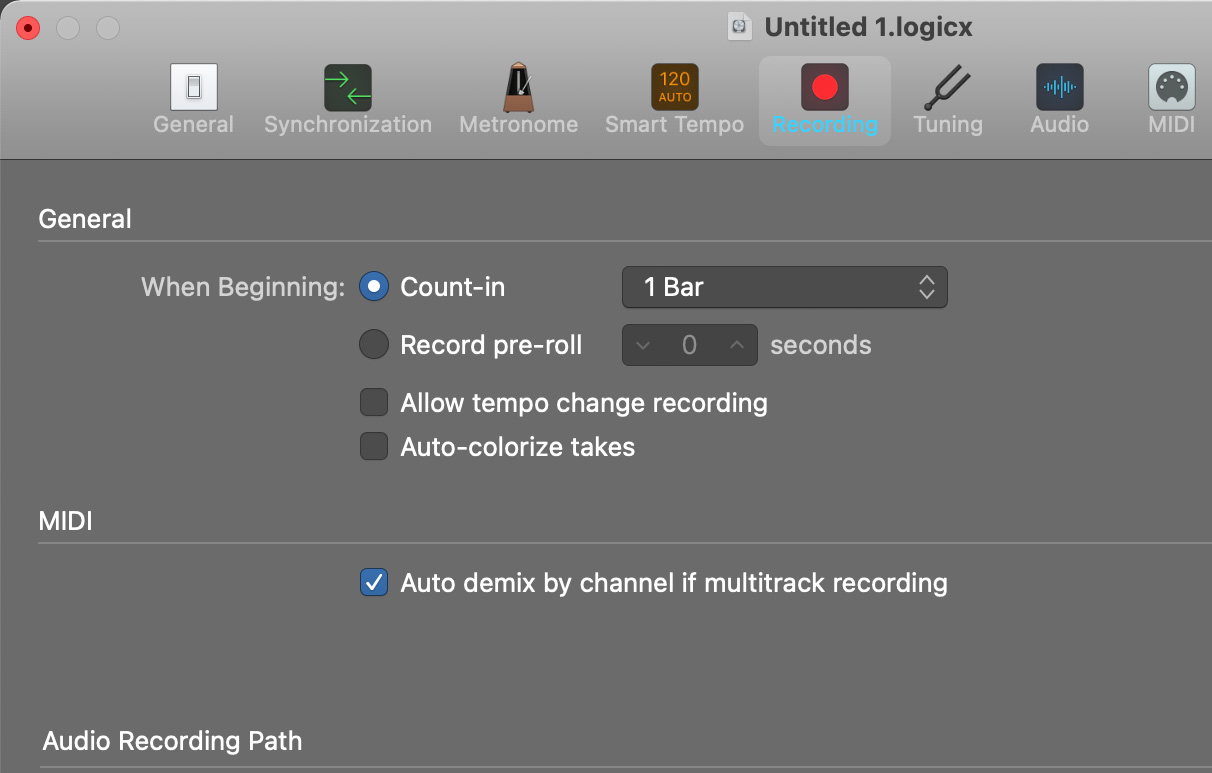
For example in Logic X, you first need to go to File > Project Settings > Recording, and enable "Auto demix by channel if multitrack recording", so that the MIDI events are recorded in their respective tracks.
To assing a track to a MIDI channel, you can open the track settings and set the "MIDI Channel" to a specific number. Either assign each track a different MIDI channel, or assign them by groups (for example Violin and Trumpet on channel 1, Cello and Trombone on channel 2...).
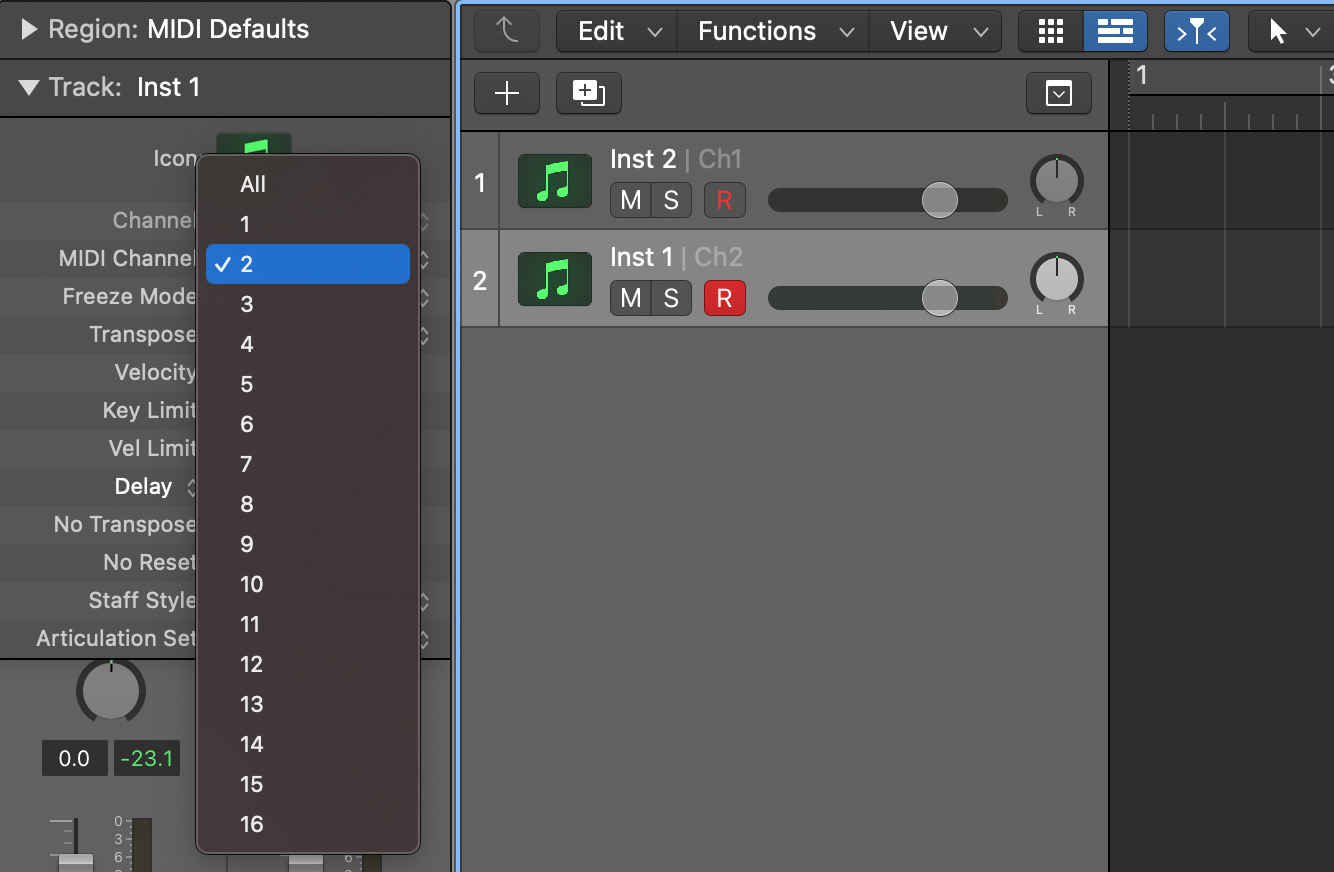
Now click on the small "R" next to the track for each track that you want to control so that it is red. Now you can send MIDI events to each active track.
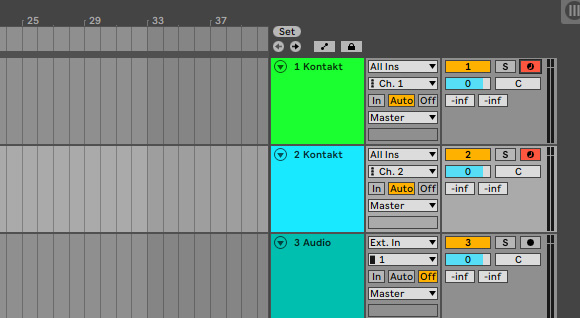
In Ableton Live you can select the channel in the In/Out Selection next to each track.

To play and record multiple tracks, activate the "Arm Recording" button (red in the image below) of each track by CTRL-clicking on each one.
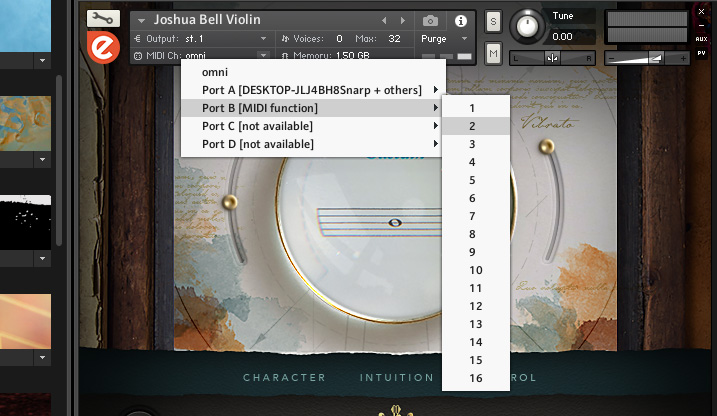
Or if you want to just play around and load all instruments in Kontakt, you can also select the channel there.
Now that you have assigned the MIDI channels, you can adjust your setup in MusiKraken.
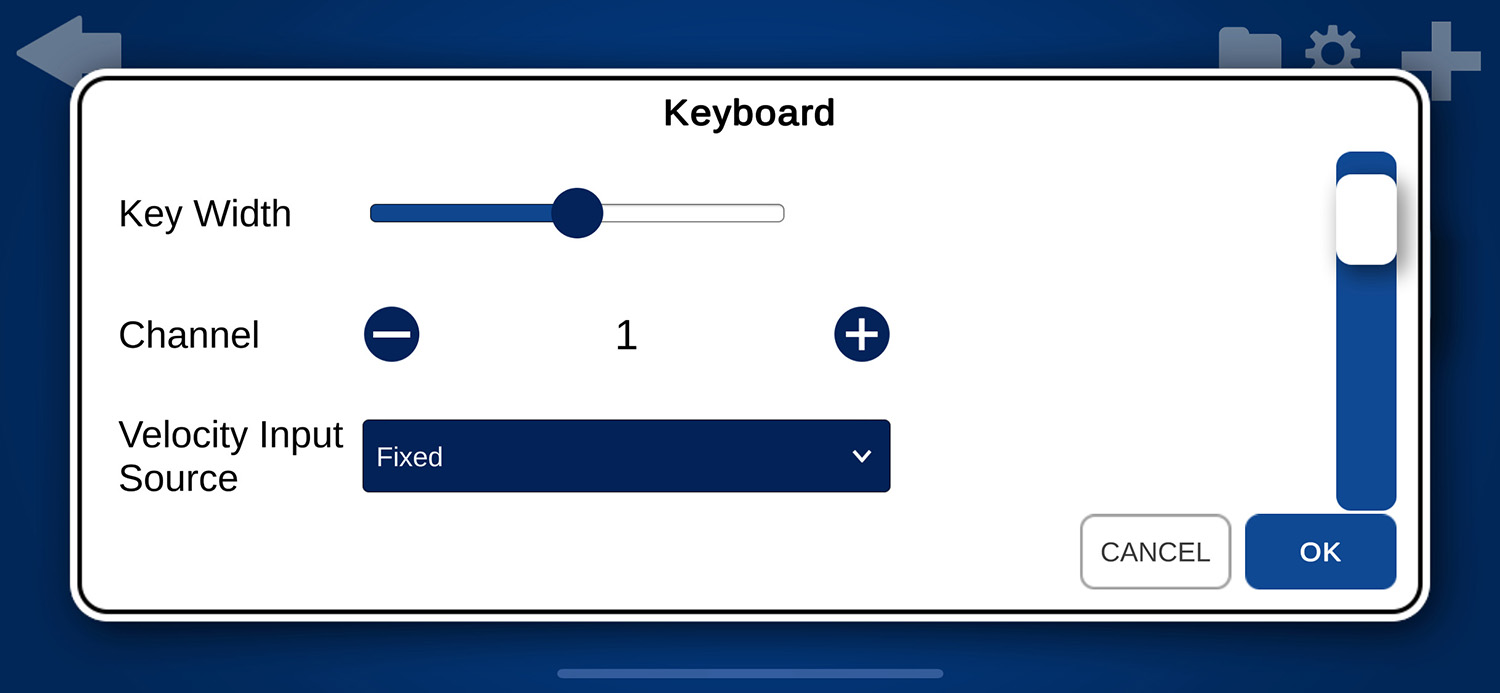
One way to send MIDI events to a specific MIDI channel is to select the target channel directly in the settings of a module. For example open the settings for the keyboard. There you see a "Channel" slider. There should be a setting like this in any module that generates MIDI events.
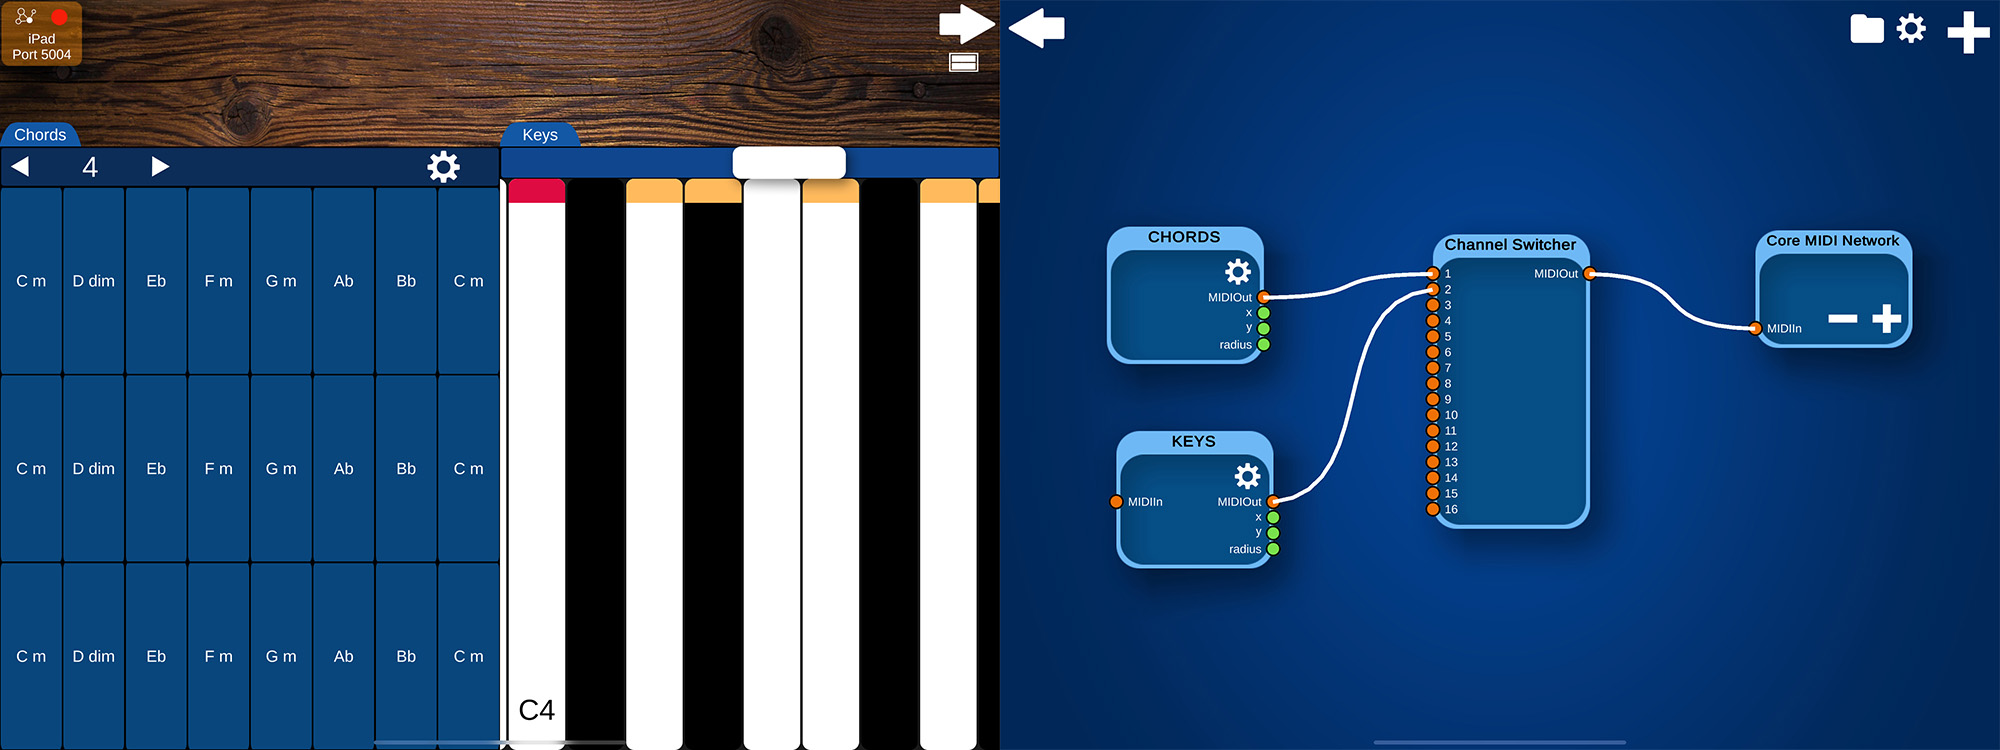
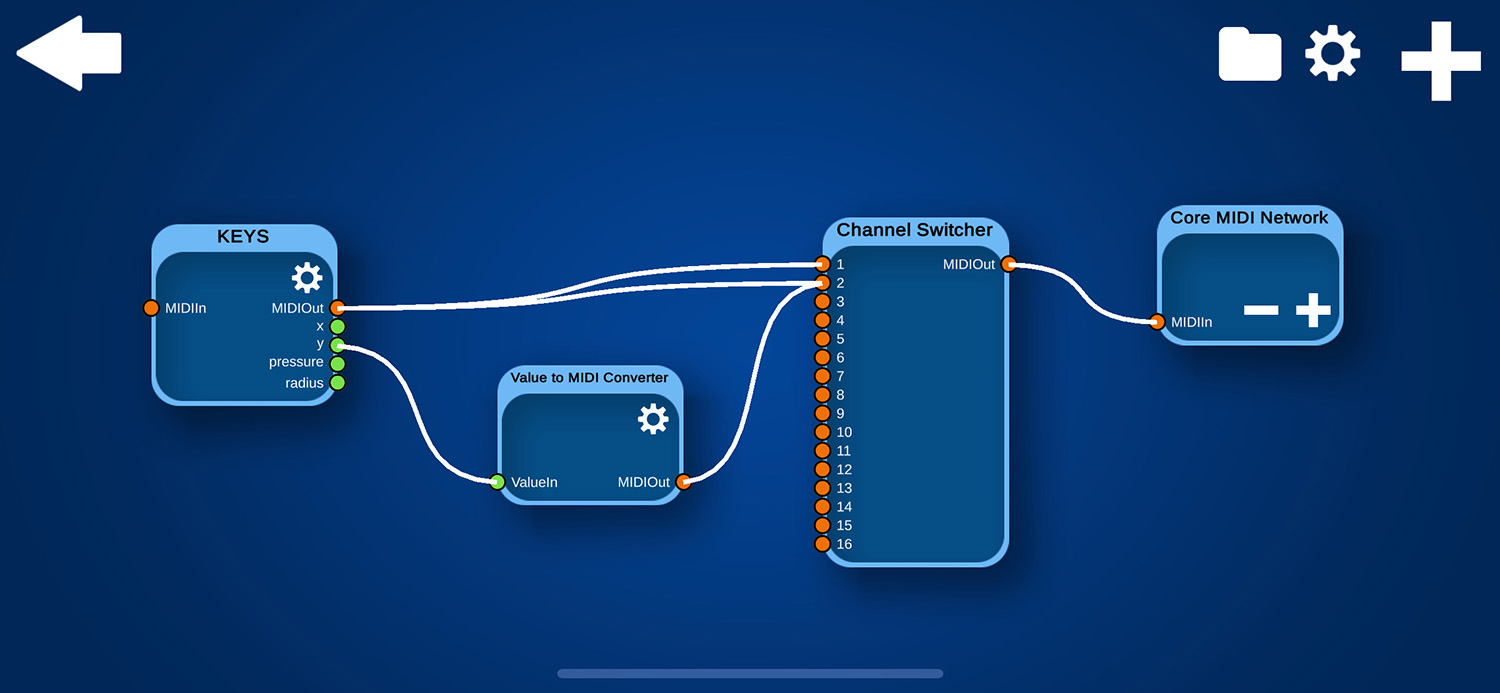
Another way is to create a "Channel Switcher" module. You can select this in the "Effects" panel. The channel switcher makes it possible to change the channel of incoming MIDI events, and therefore route MIDI events to a specific channel. In the example below, the MIDI events coming from the keyboard are sent to channel 1, and they are also sent to channel 2. But the MIDI events for channel 2 are first transposed by one octave, so the instrument in channel 2 will play one octive lower than that in channel 1.

This was the basics of how to control which MIDI events are sent to which instrument. Here are a few examples of how you can use this.
Multiple input controls
Create multiple controls that can generate MIDI notes and assign each of that to a different instrument. With split-screen, you can for example create two Keyboards and connect each to a different instrument.
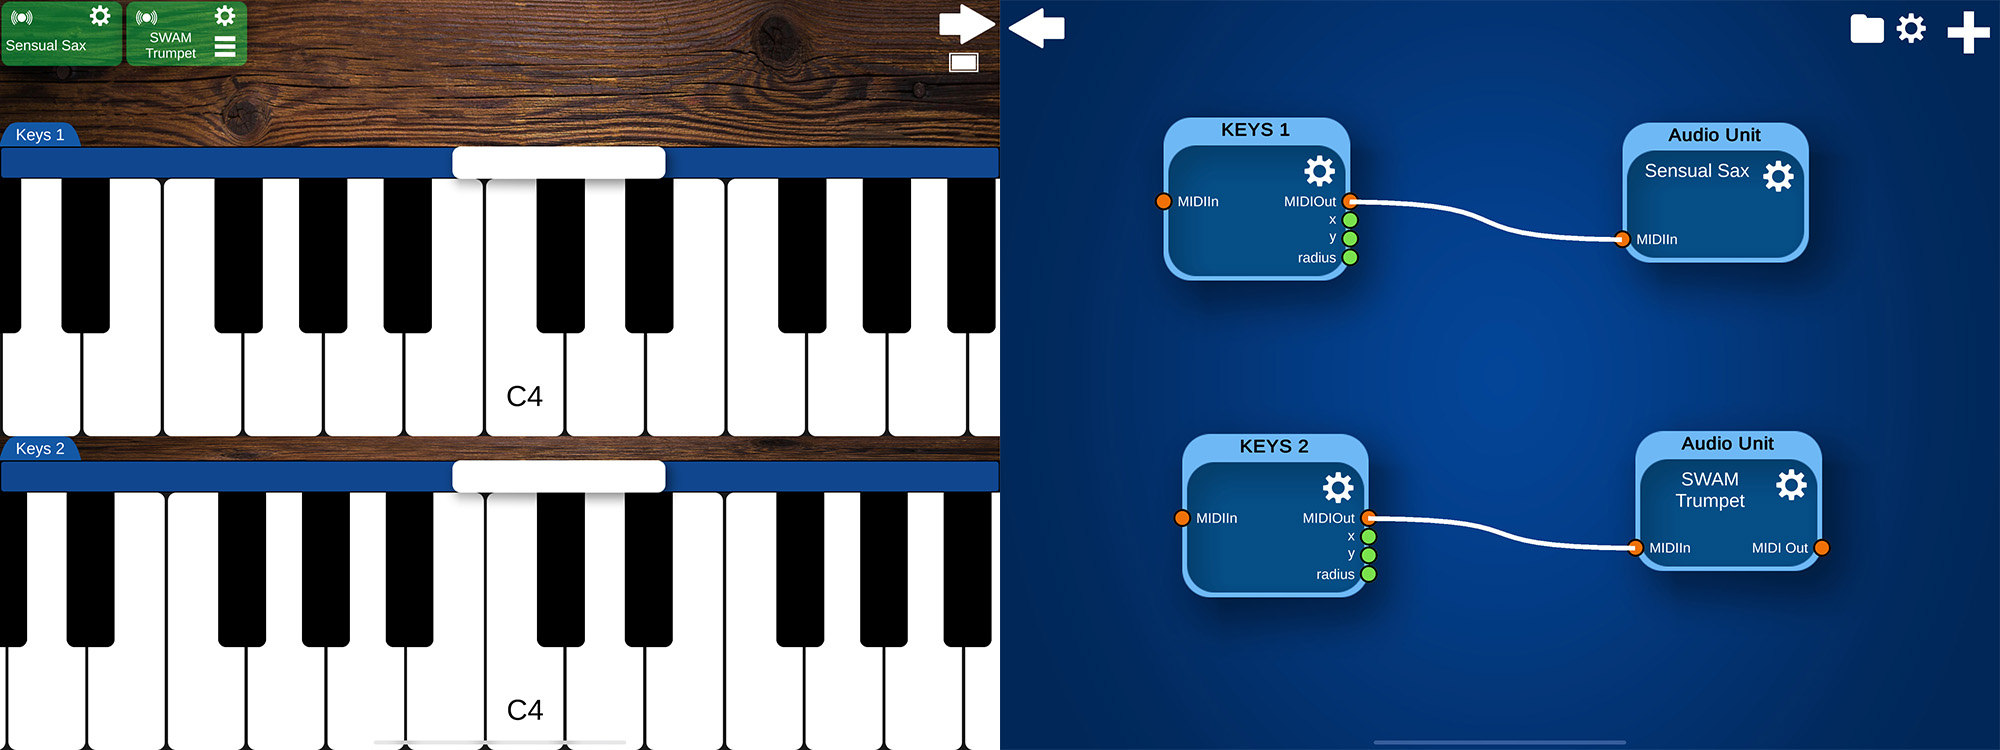
Or create a Chords Pad and a Keyboard, play chords with one hand on one instrument and play the melody with the other hand and on another instrument.
Or by setting the Value to MIDI converter to type "Note", can generate notes or chords from Face Tracking, Hand Tracking, TrueDepth sensor, Microphone, Accelerometer, or whatever else that generates values. And send them to different channels or AudioUnit instruments. So you could even play an instrument with the keyboard and play another one by sliding on the keys, if you feel like it.
Layering multiple instruments or articulations
One nice thing that you can do when controlling multiple instruments is to layer two instruments, or two articulations of the same instrument, on top of each other. And control the mix or other parameters independently of those instruments.
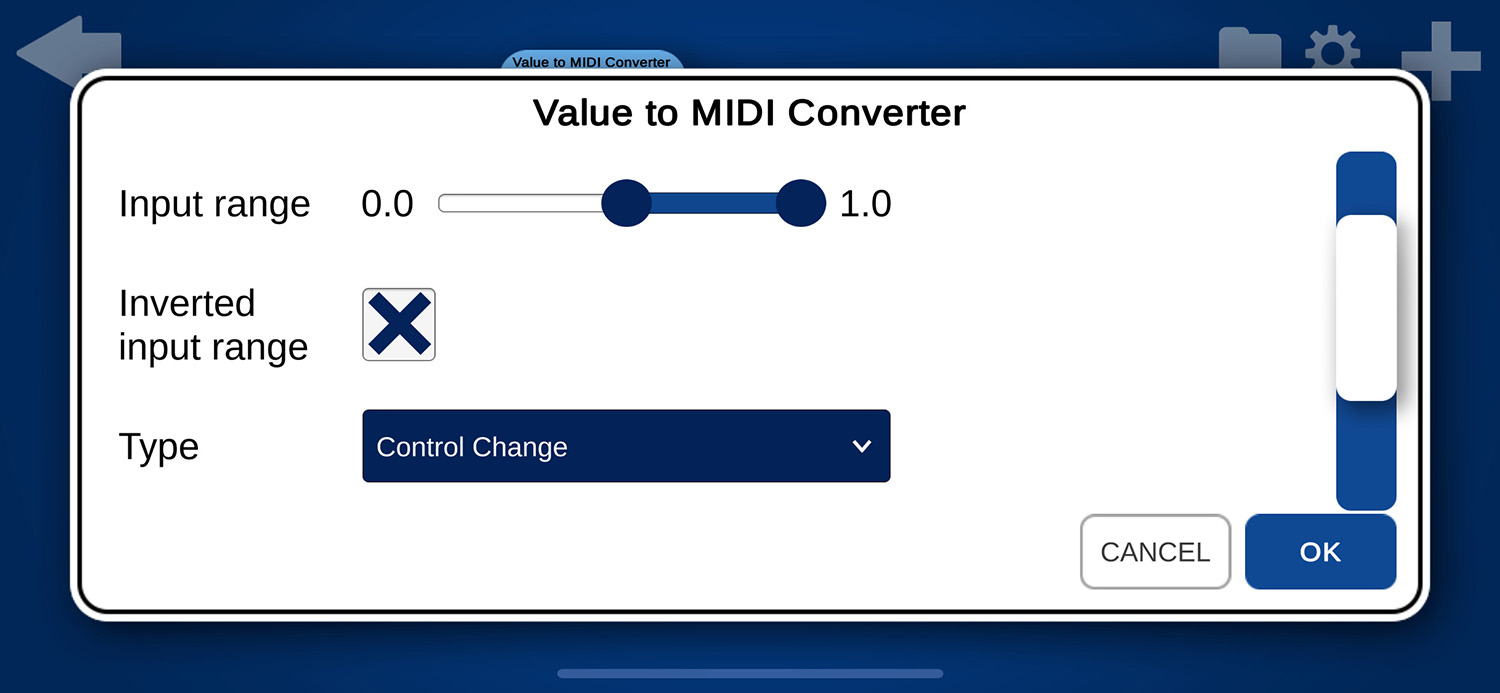
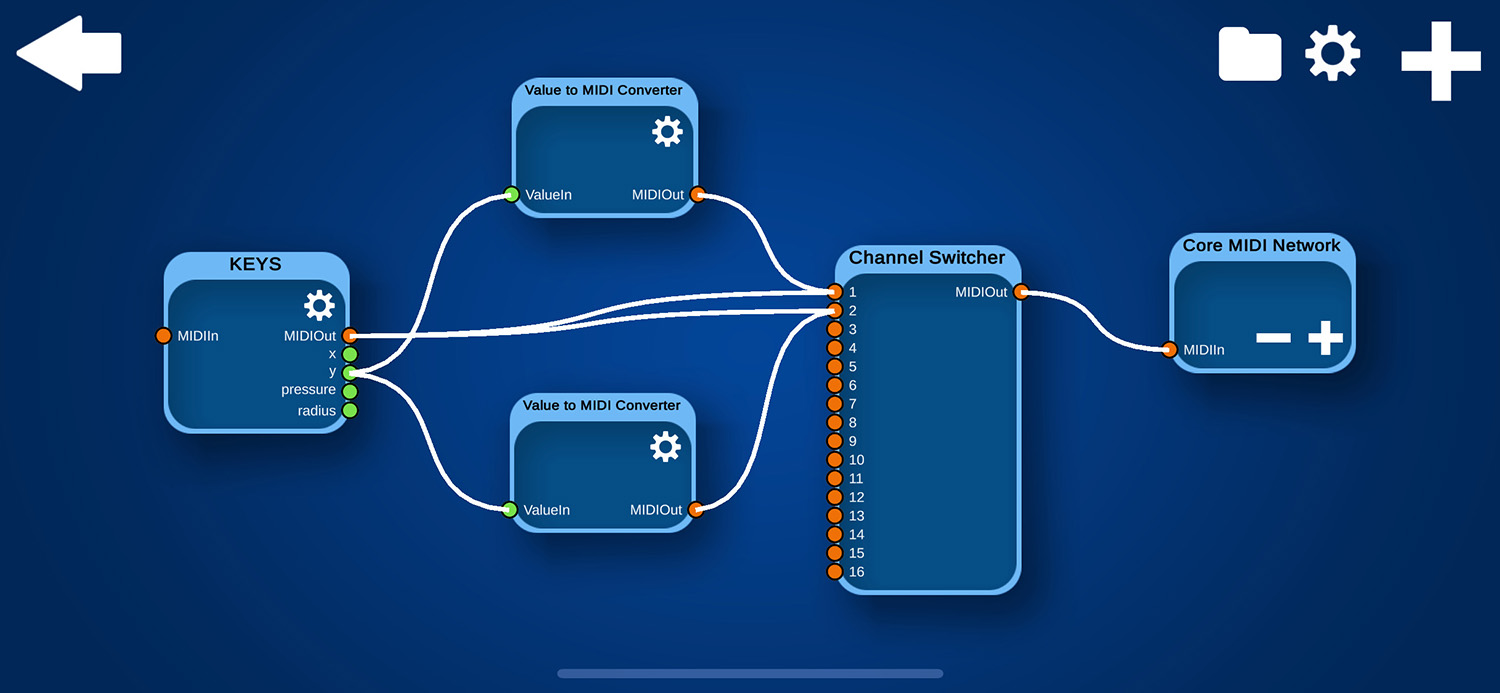
In the example below, I have loaded a violin patch on channel 1, and the same violin with a tremolo patch on channel 2. And then I made a connection between the y-port and the channel-2 port of the channel switcher. In the Value to MIDI converter, I then set the "Target Controller" to "Expresion" (CC 11; Note that in many instruments this also sounds interesting when using Modulation CC 1). Now when I slide upwards on the keys, it will add the tremolo to the "normal" sound, and when sliding downwards, there will be less tremolo.
If you want to replace the sound of channel 1 with the sound of channel 2 instead, you can add a connection between the y-port and the channel-1 port. Also set this to Expression (or whatever you used before), but now also enable "Inverted input range". So now if you slide upwards, the sound on channel 1 will get more silent and the sound on channel 2 will get louder.
This of course works with all kinds of combinations. You can for example turn a flute sound slowly into the sound of a trumpet when sliding. Or you can use the Accelerometer, or your mouth, to control the mix. The possibilities are almost endless.
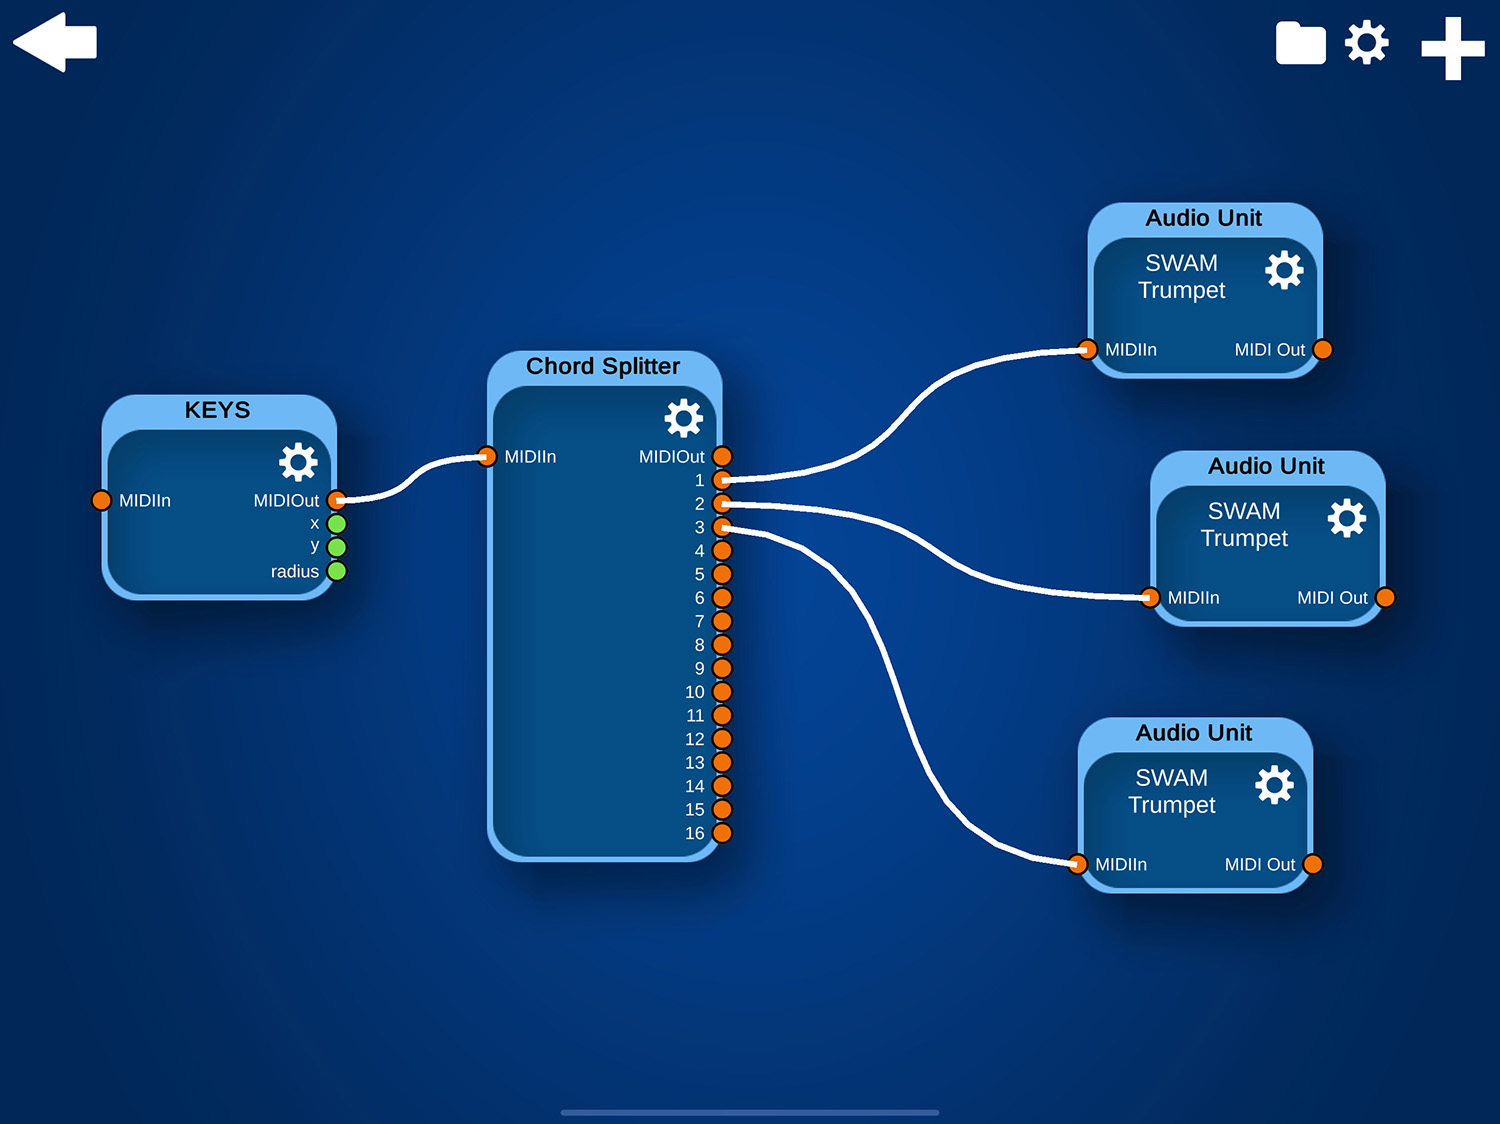
Chord Splitter
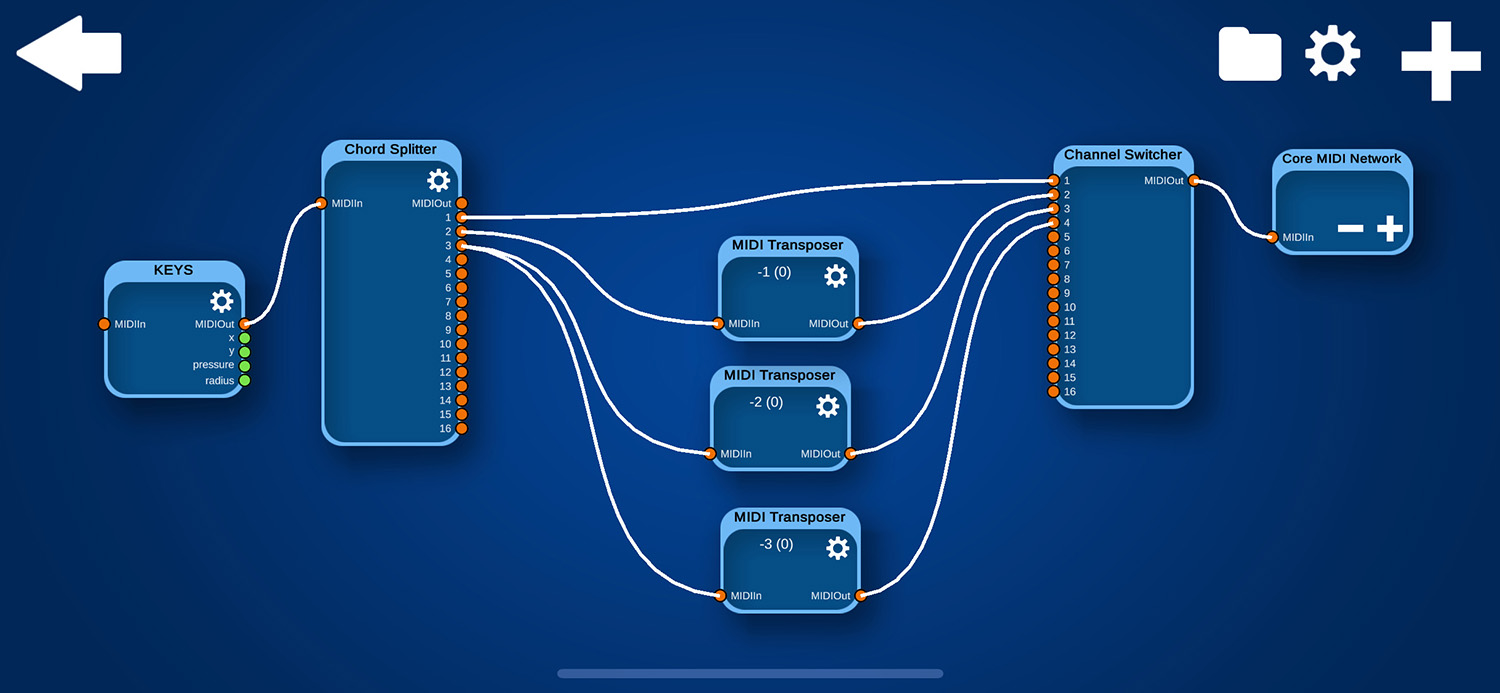
The Chord Splitter separates played notes into separate channels. It needs a short (settable) delay so that it can properly detect incoming chords. By default, it then sends the highest note to channel 1, the next highest note to channel 2 and so on. But this is also settable.
This way you can connect different instruments to each channel and play different notes of a chord on each of them simultaneously. So for example connect a Violin on channel 1, a Viola on channel 2, a Cello on channel 3 and a Bass on channel 4. Or a full orchestra. Or any other combination you want.
If you connect to the MIDIOut port of the Chord Splitter, it will send through all the notes, and they are already assigned to their channel.

The output ports with the numbers only send the notes that were assigned to that channel. By combining this with the Channel Switcher, you can create complex setups, transpose some notes, send some notes to multiple channels and so on.
A nice alternative of controlling multiple different instruments is to control multiple instances of the same legato / mono instrument. This way you can turn monophonic instruments into polyphonic ones.
You can also combine all these techniques. In the example below, I connected a Chords Pad to a Chord Splitter and transposed channels 2 and 3. So the Chords Pad is controlling the instruments on channels 1 to 3. And the Keyboard controls the instrument in channel 4. I also added a connection to their y-ports, so that I can change the modulation of these separately on each control.
